Saving Anything to a Study
One consistent “Add to Study” pattern is used everywhere on the site — learn it once and you can add almost anything to a study.
Free account required. This topic only matters once you’re ready to organize content into a study.
- Create a study first from My Studies, or create one on the fly from the Add to Study prompt.
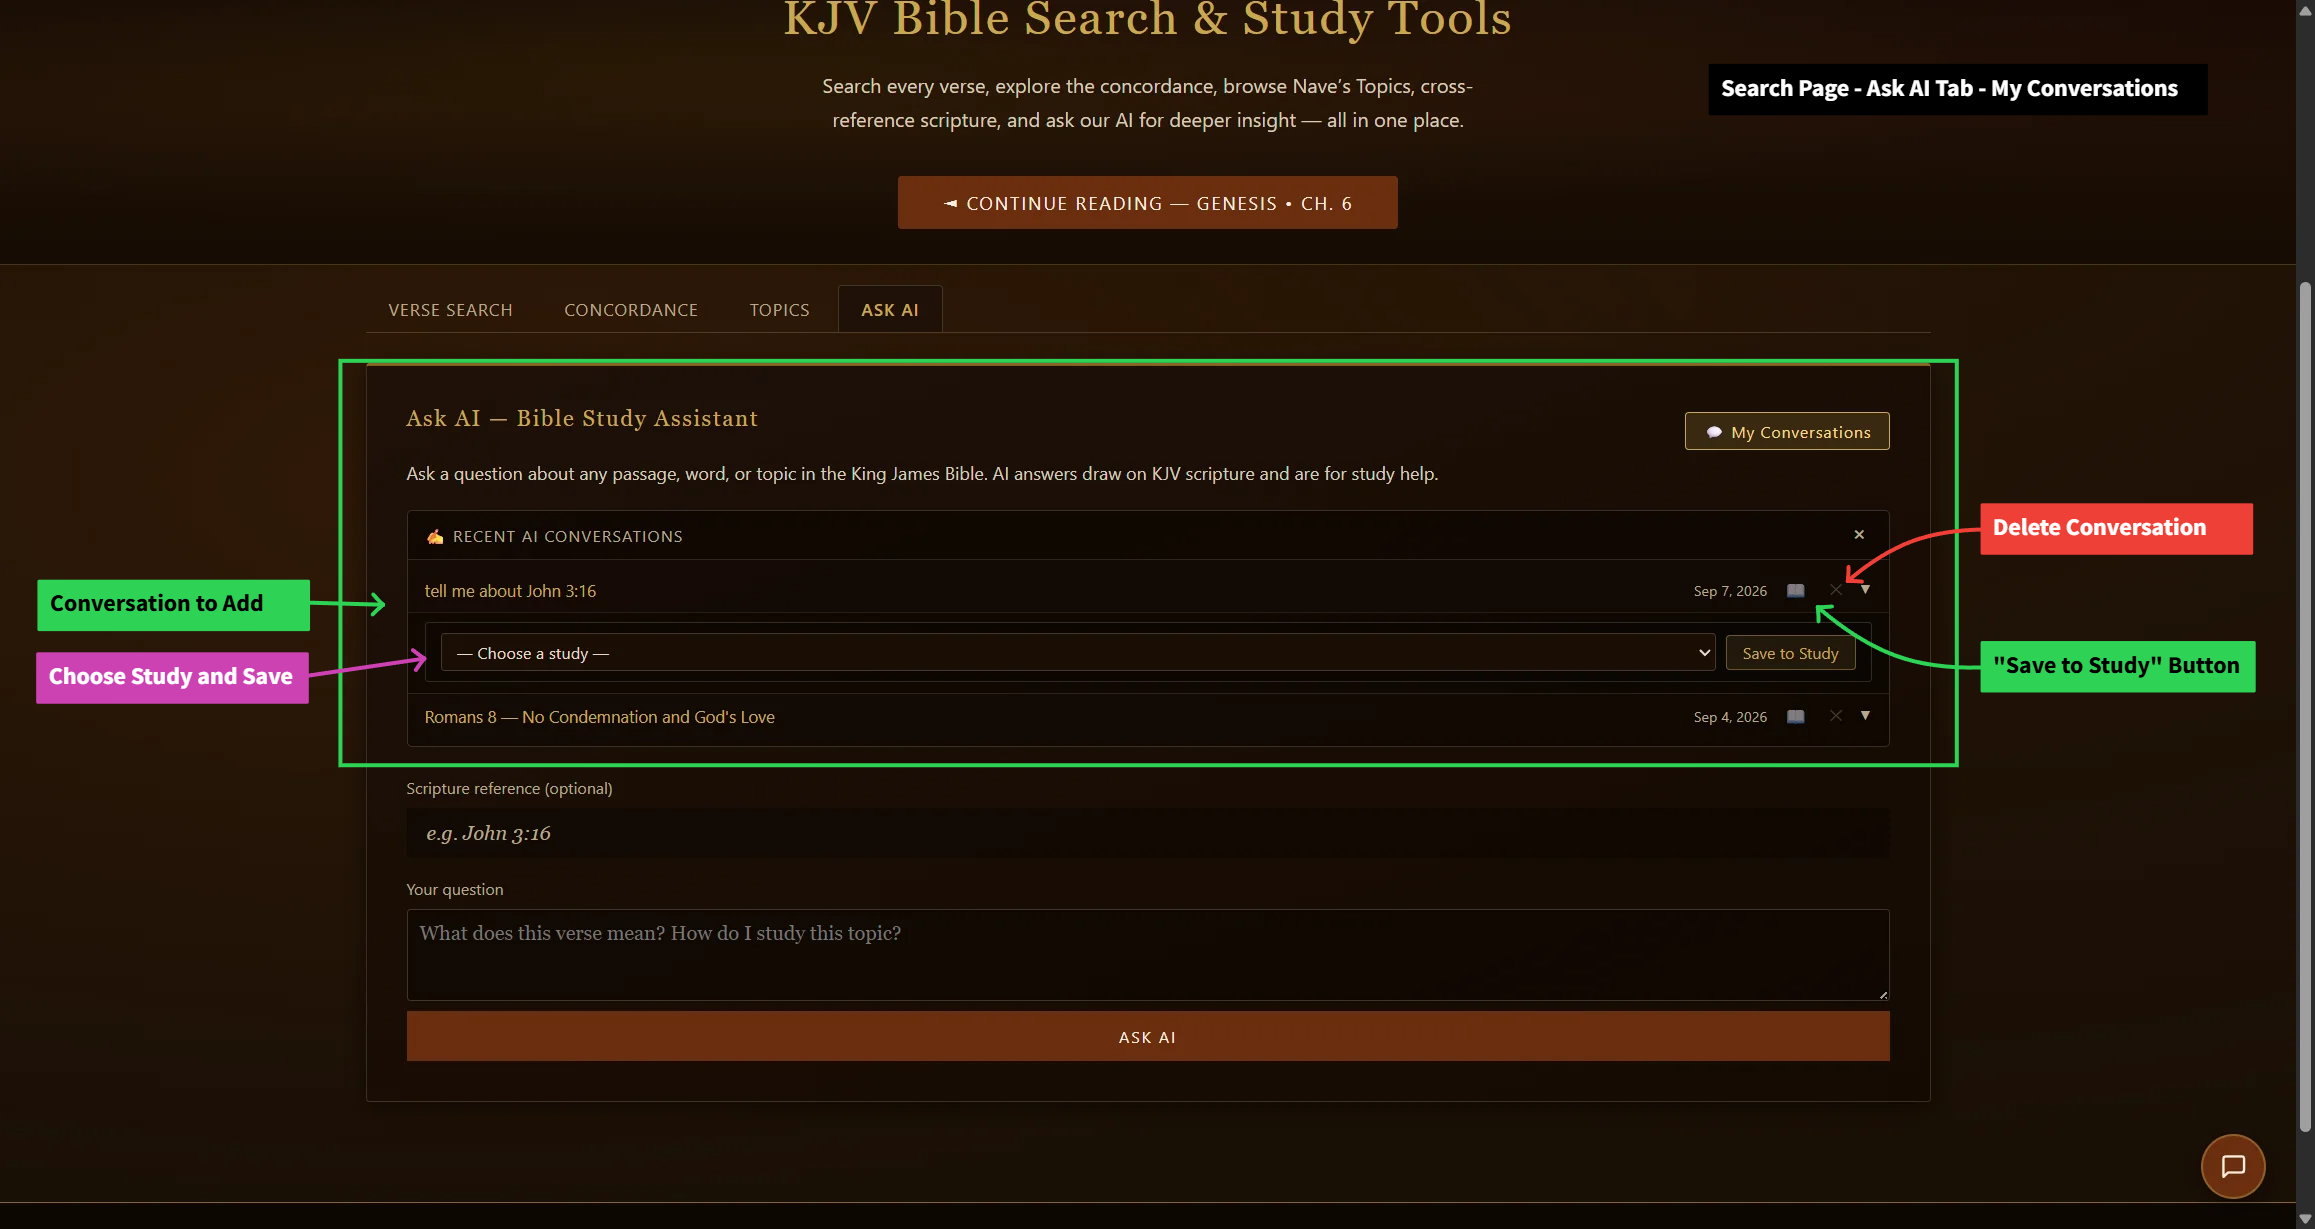
- From the Search page’s Ask AI tab, click Add to Study on any saved conversation.
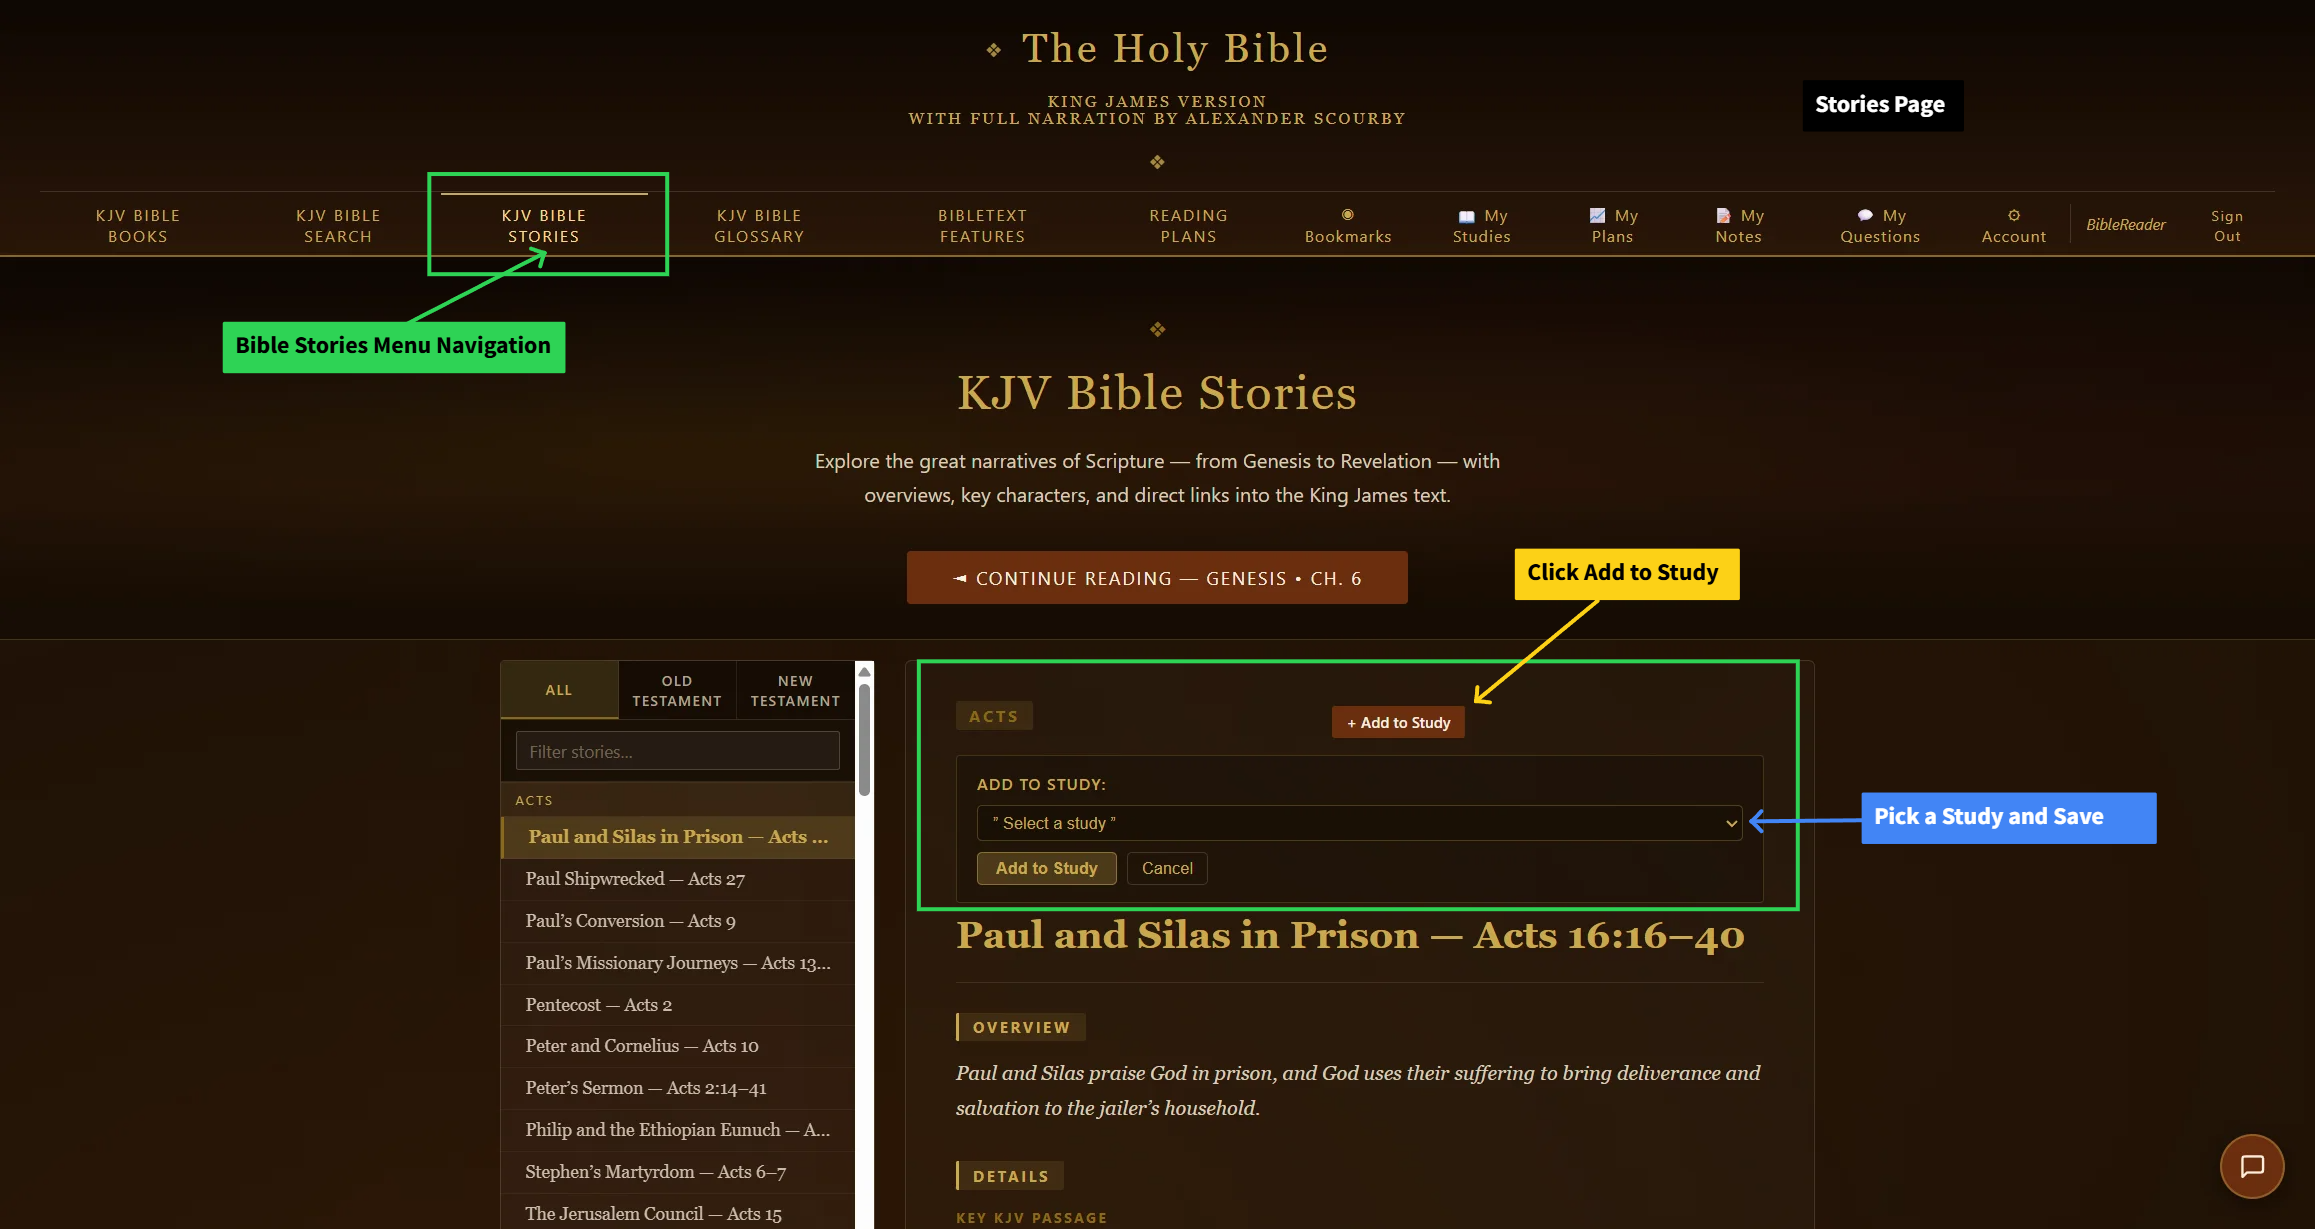
- From any Bible story, click Add to Study to attach it.
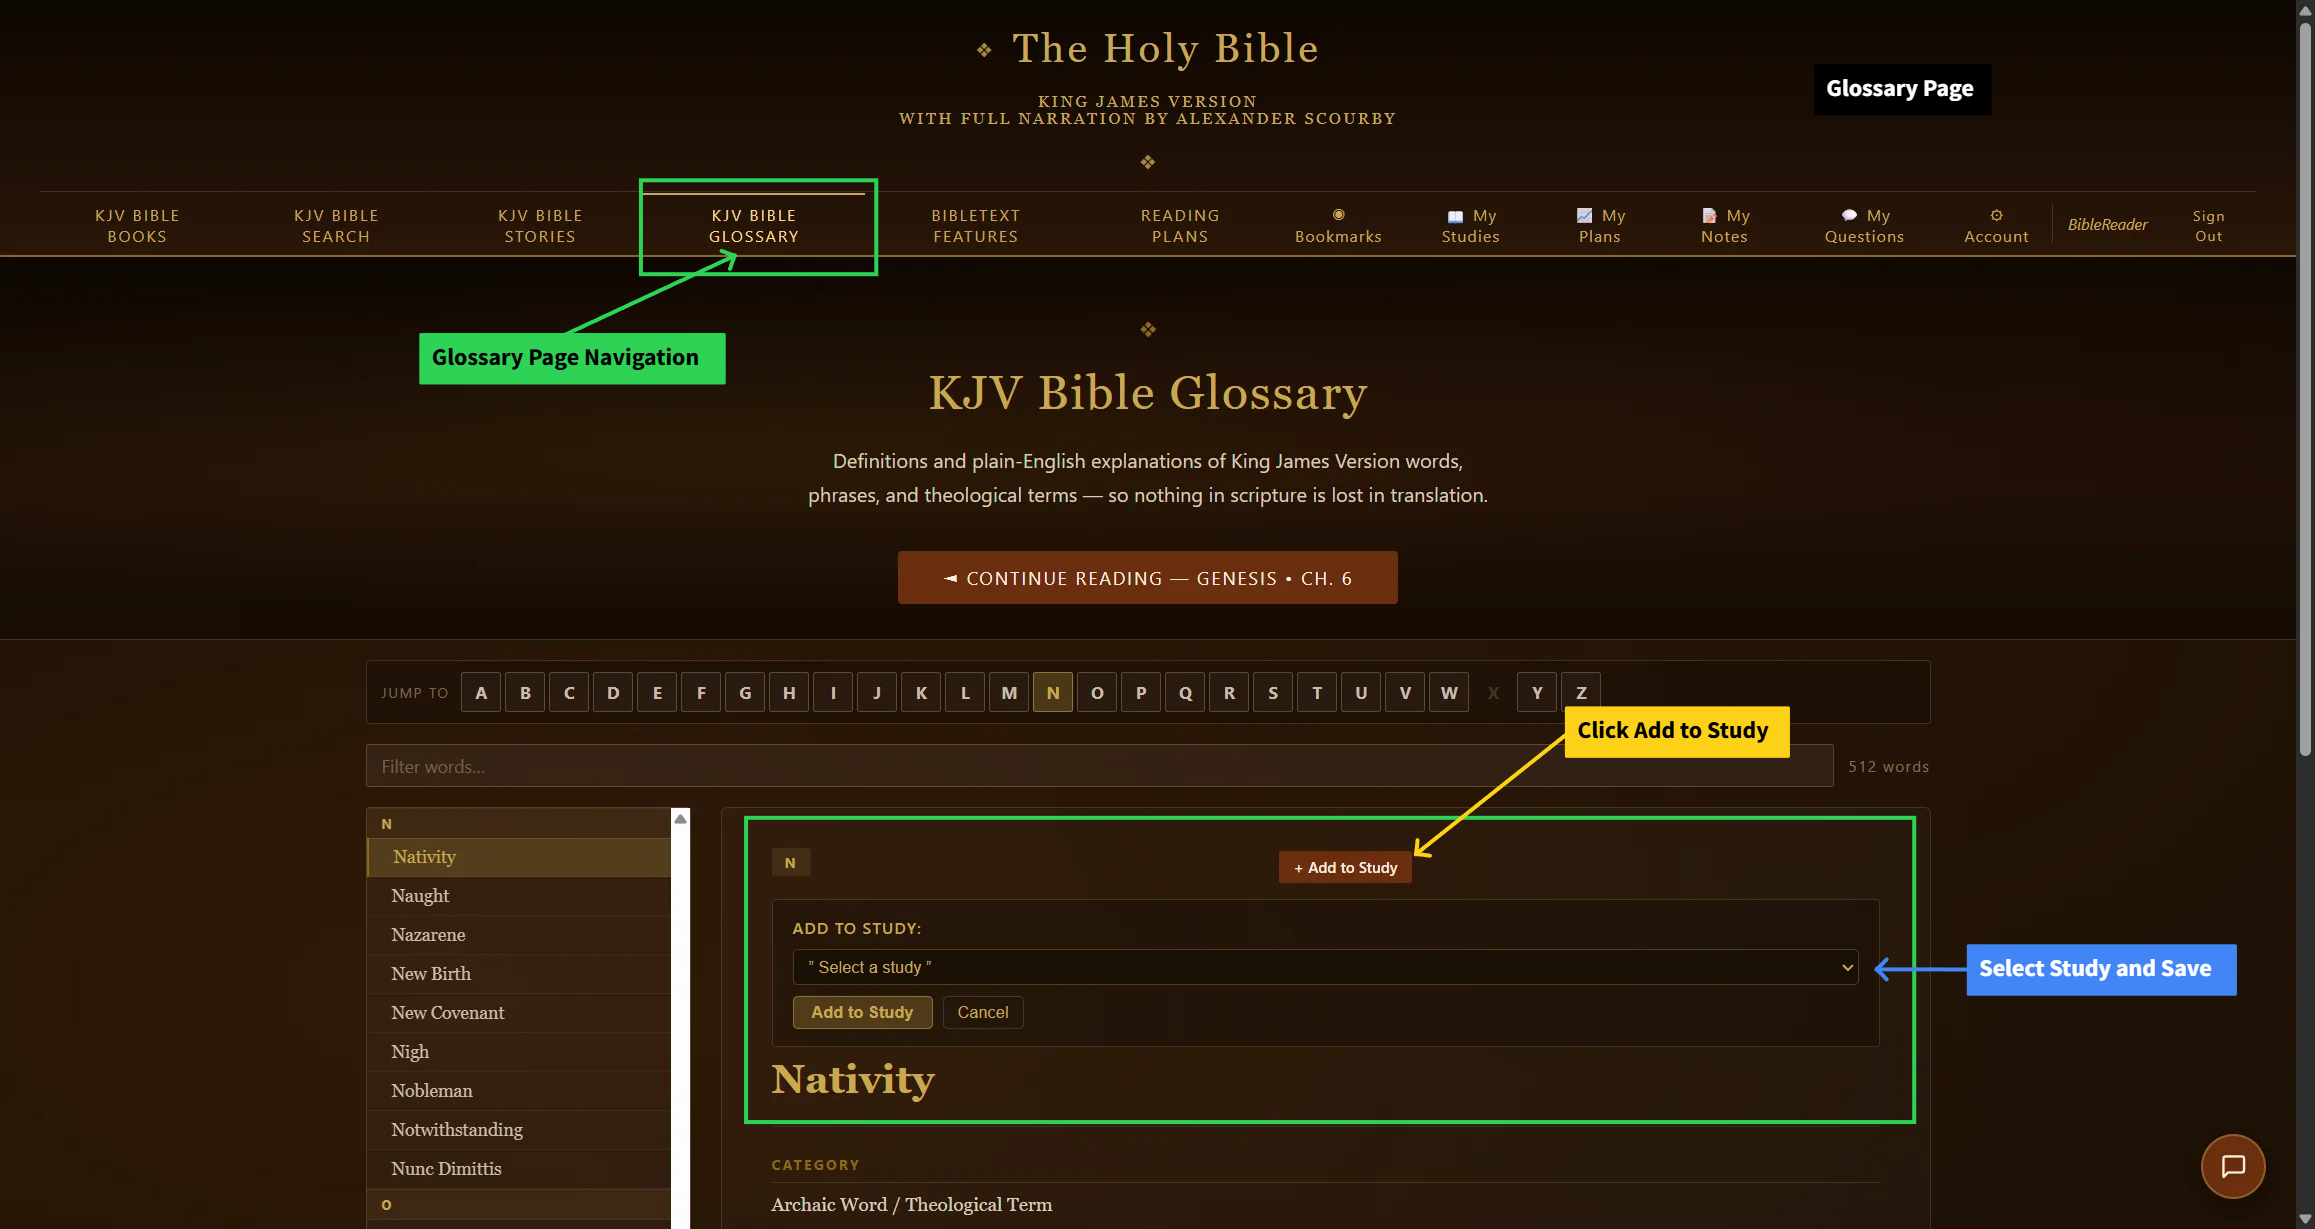
- From any glossary word, click Add to Study to attach it.
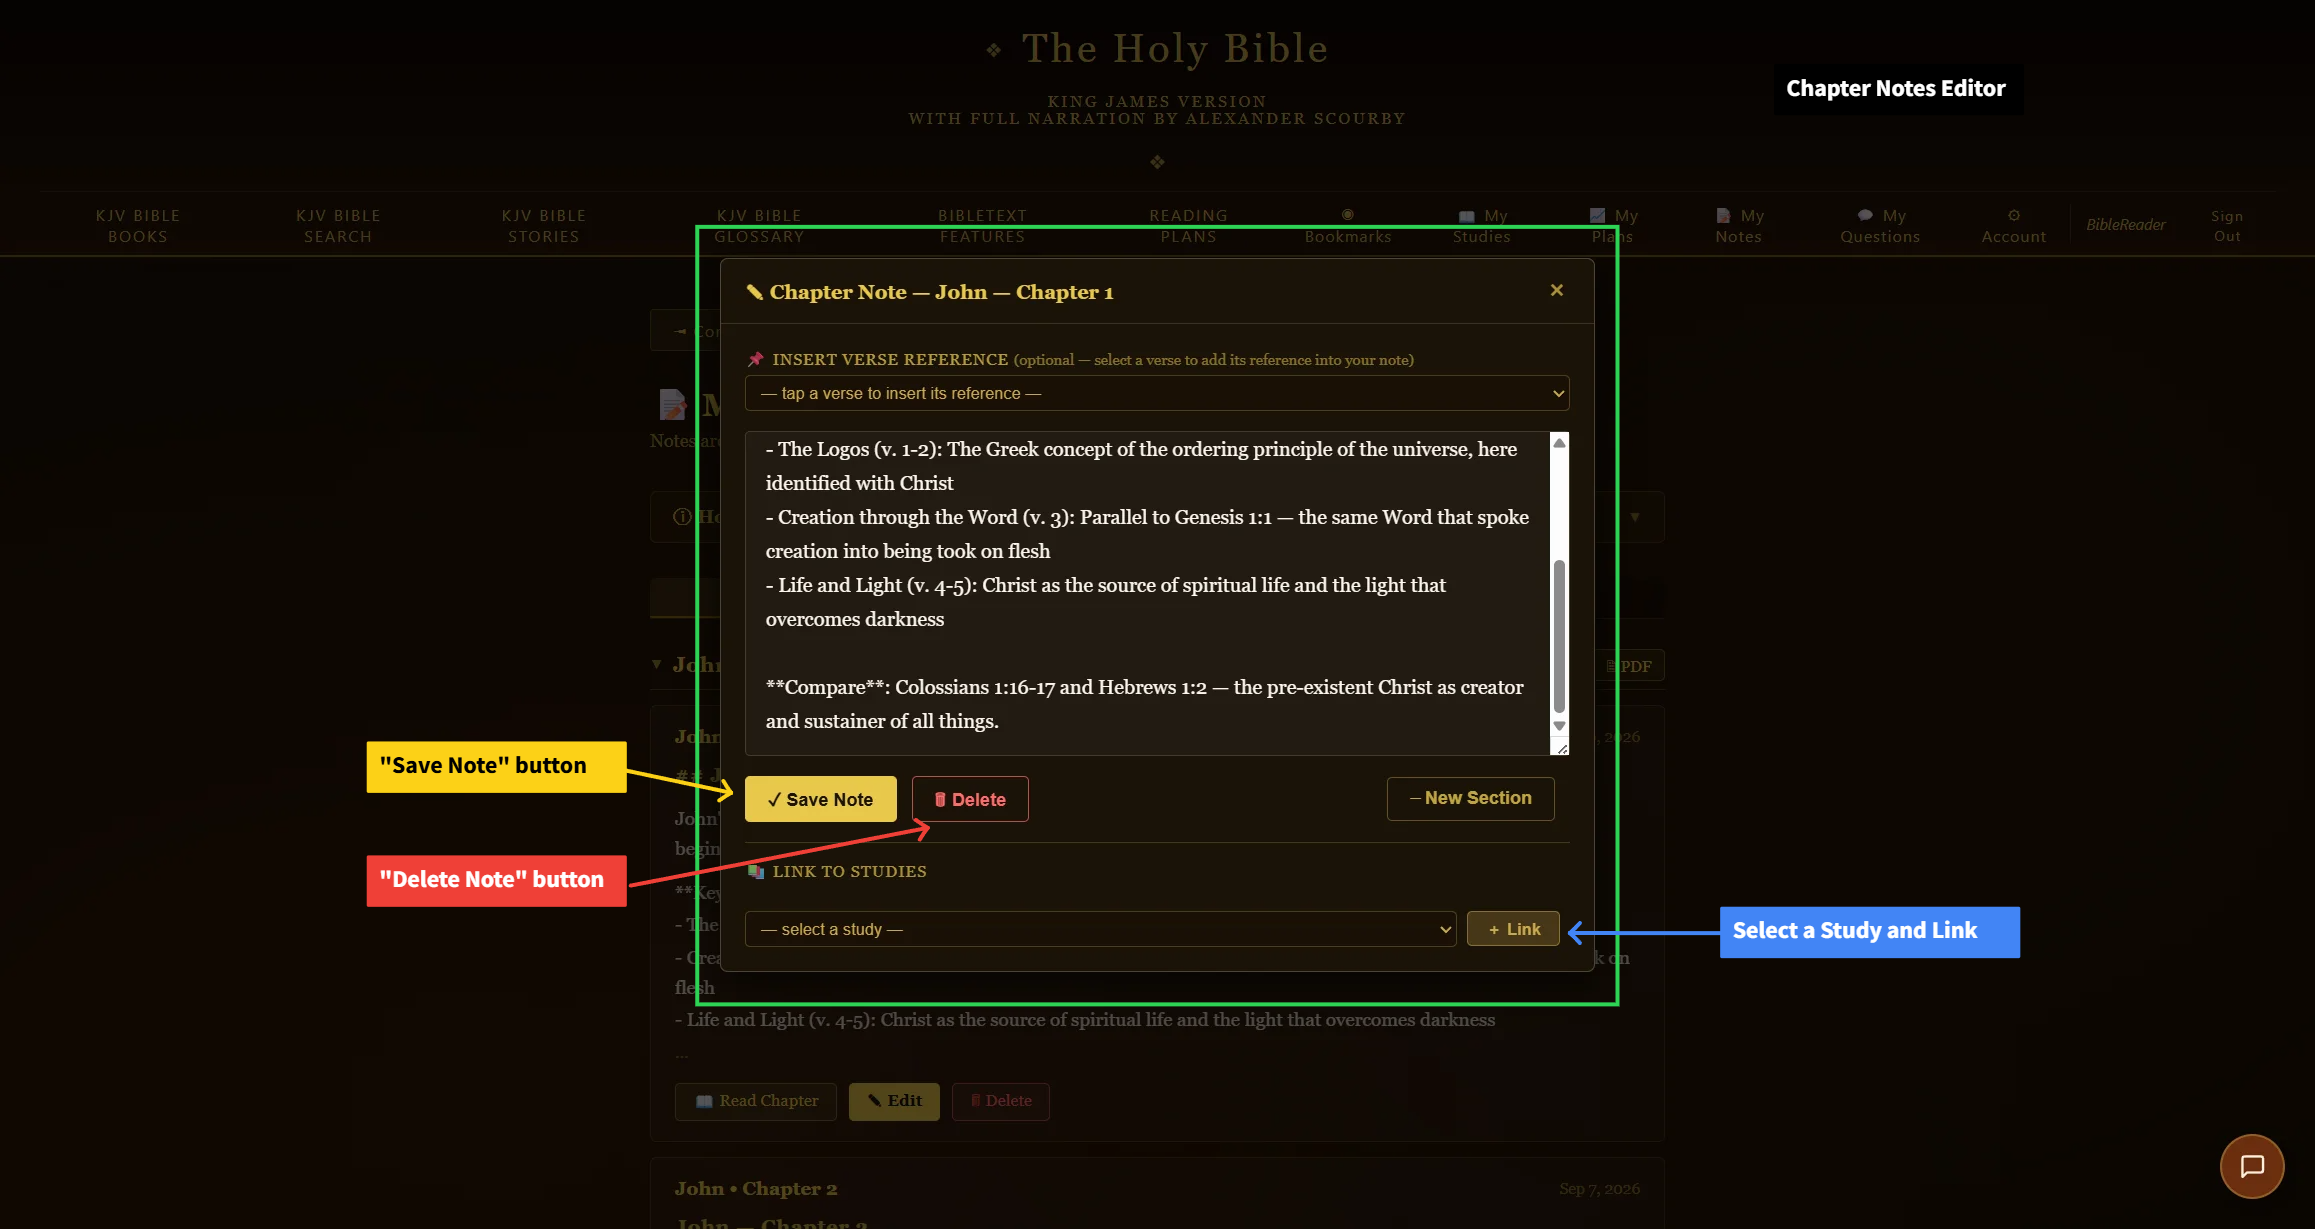
- From My Chapter Notes, click Add to Study on any note — or save it straight to a study from inside the note editor itself while you’re writing it.
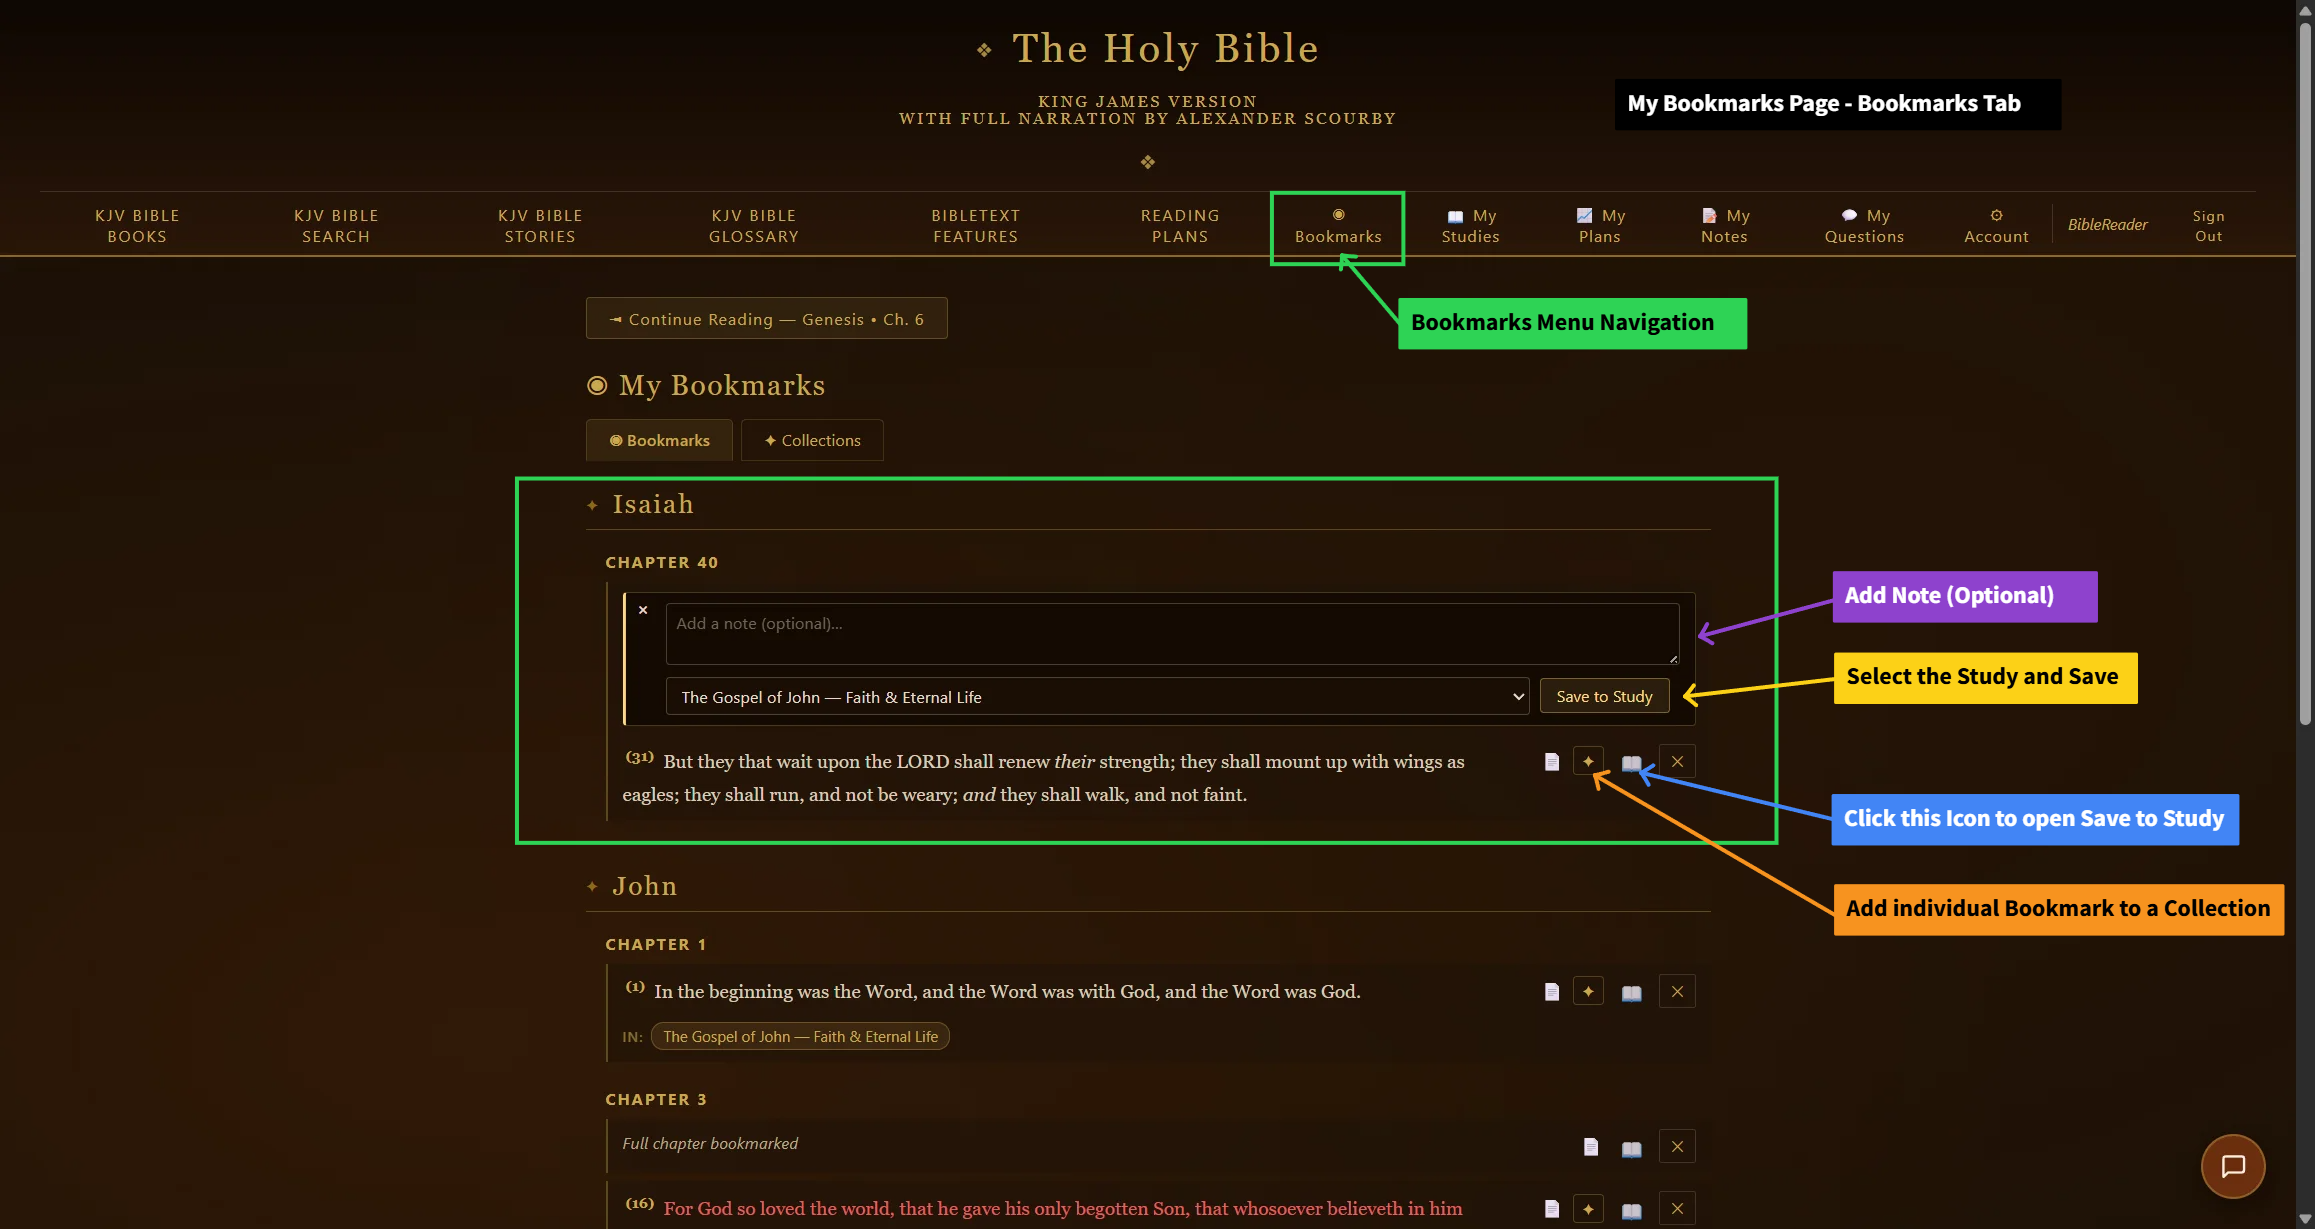
- From My Bookmarks, click Add to Study on the Bookmarks tab.
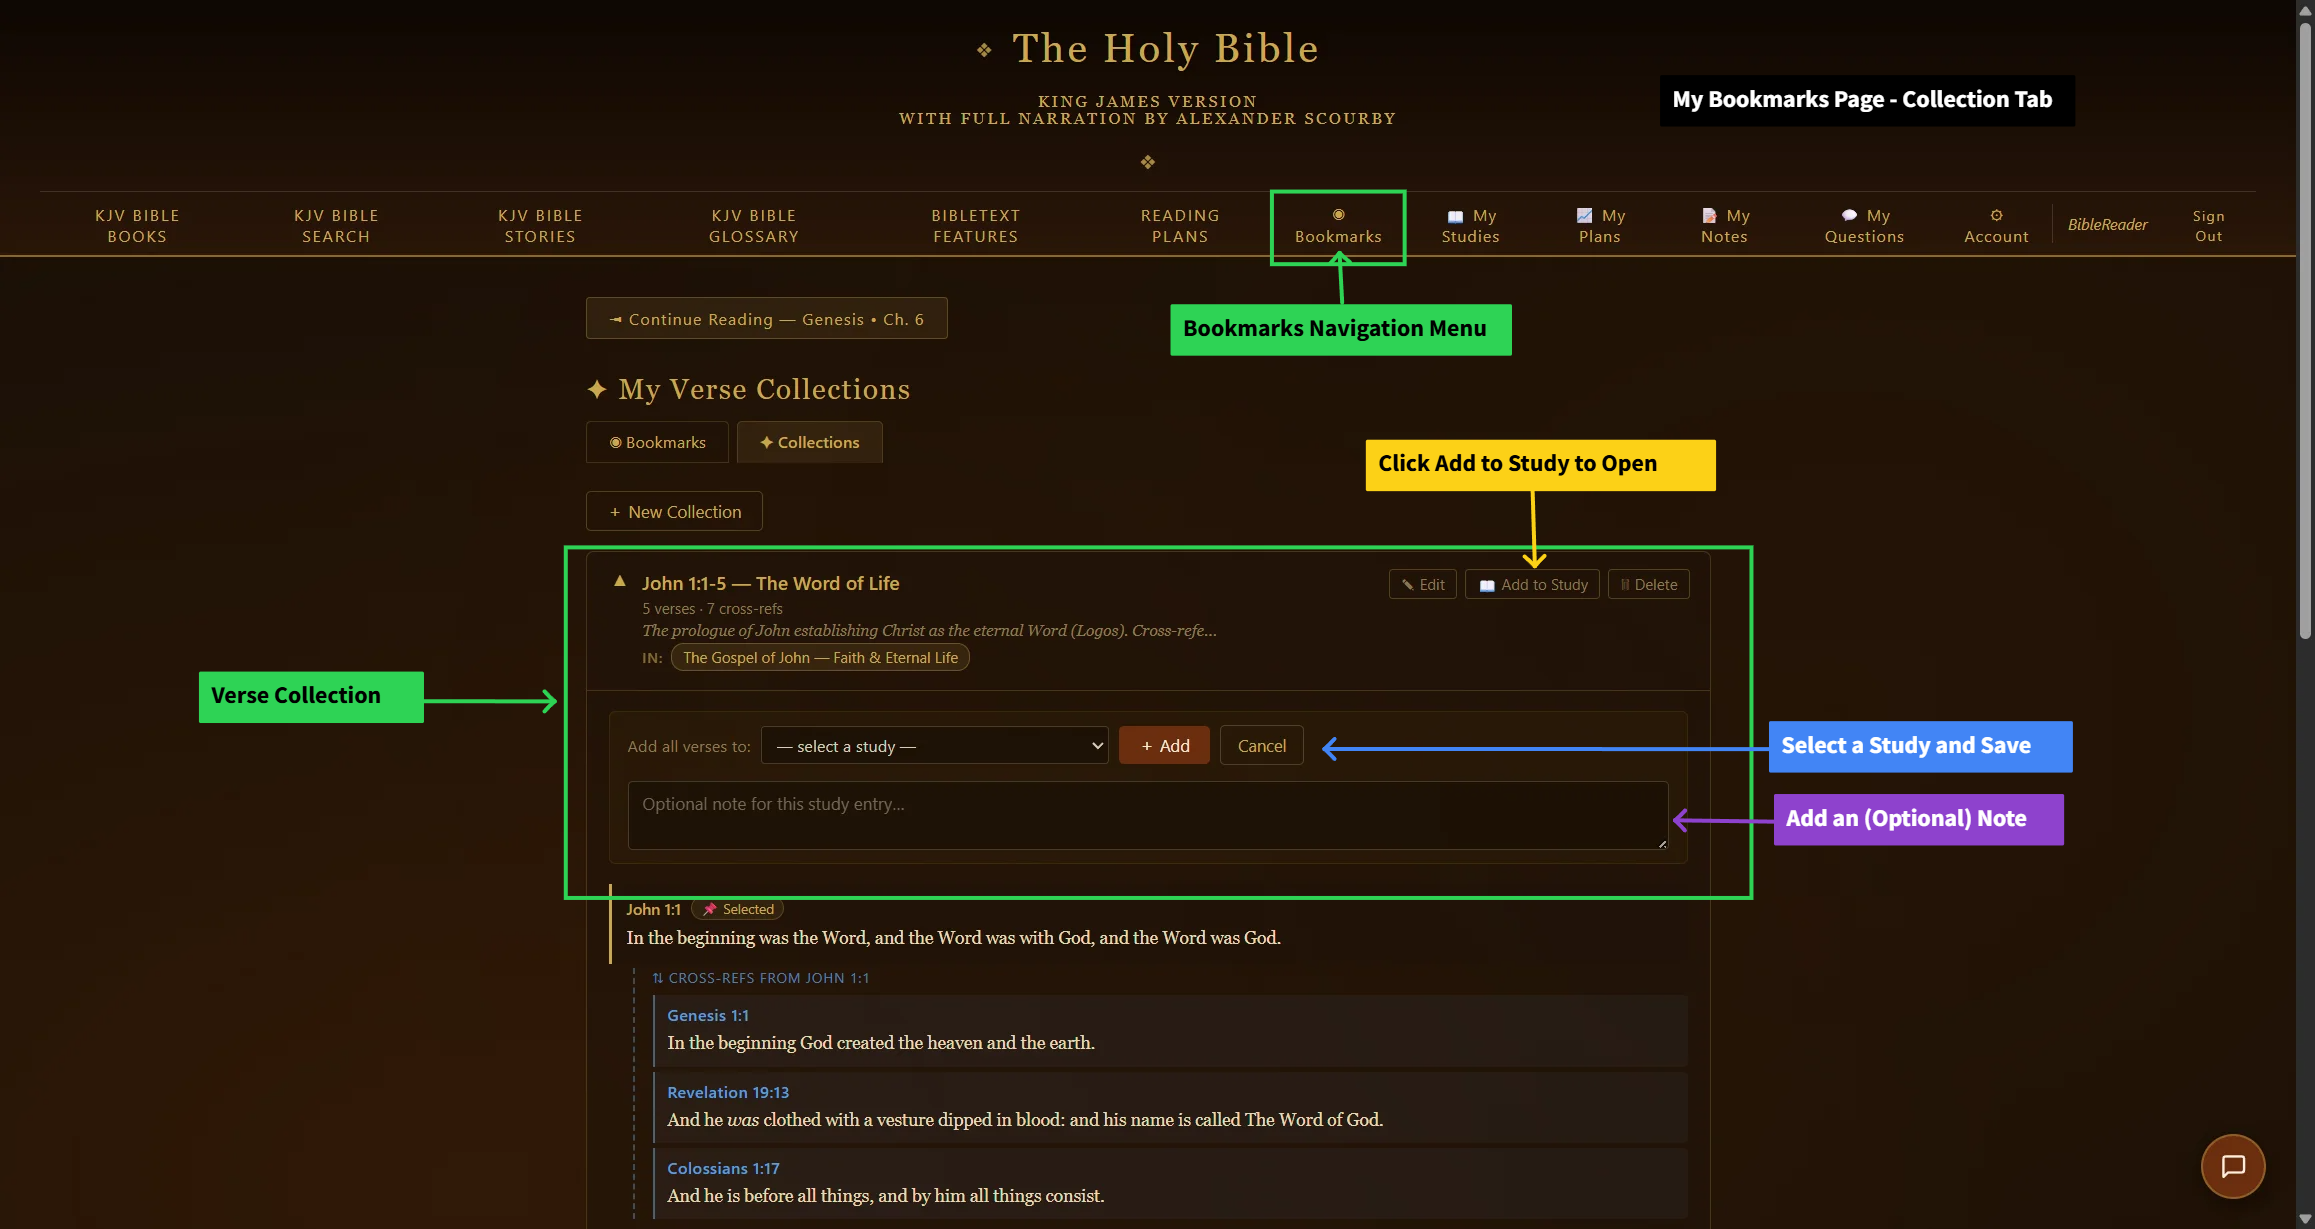
- From My Bookmarks, click Add to Study on the Collections tab.
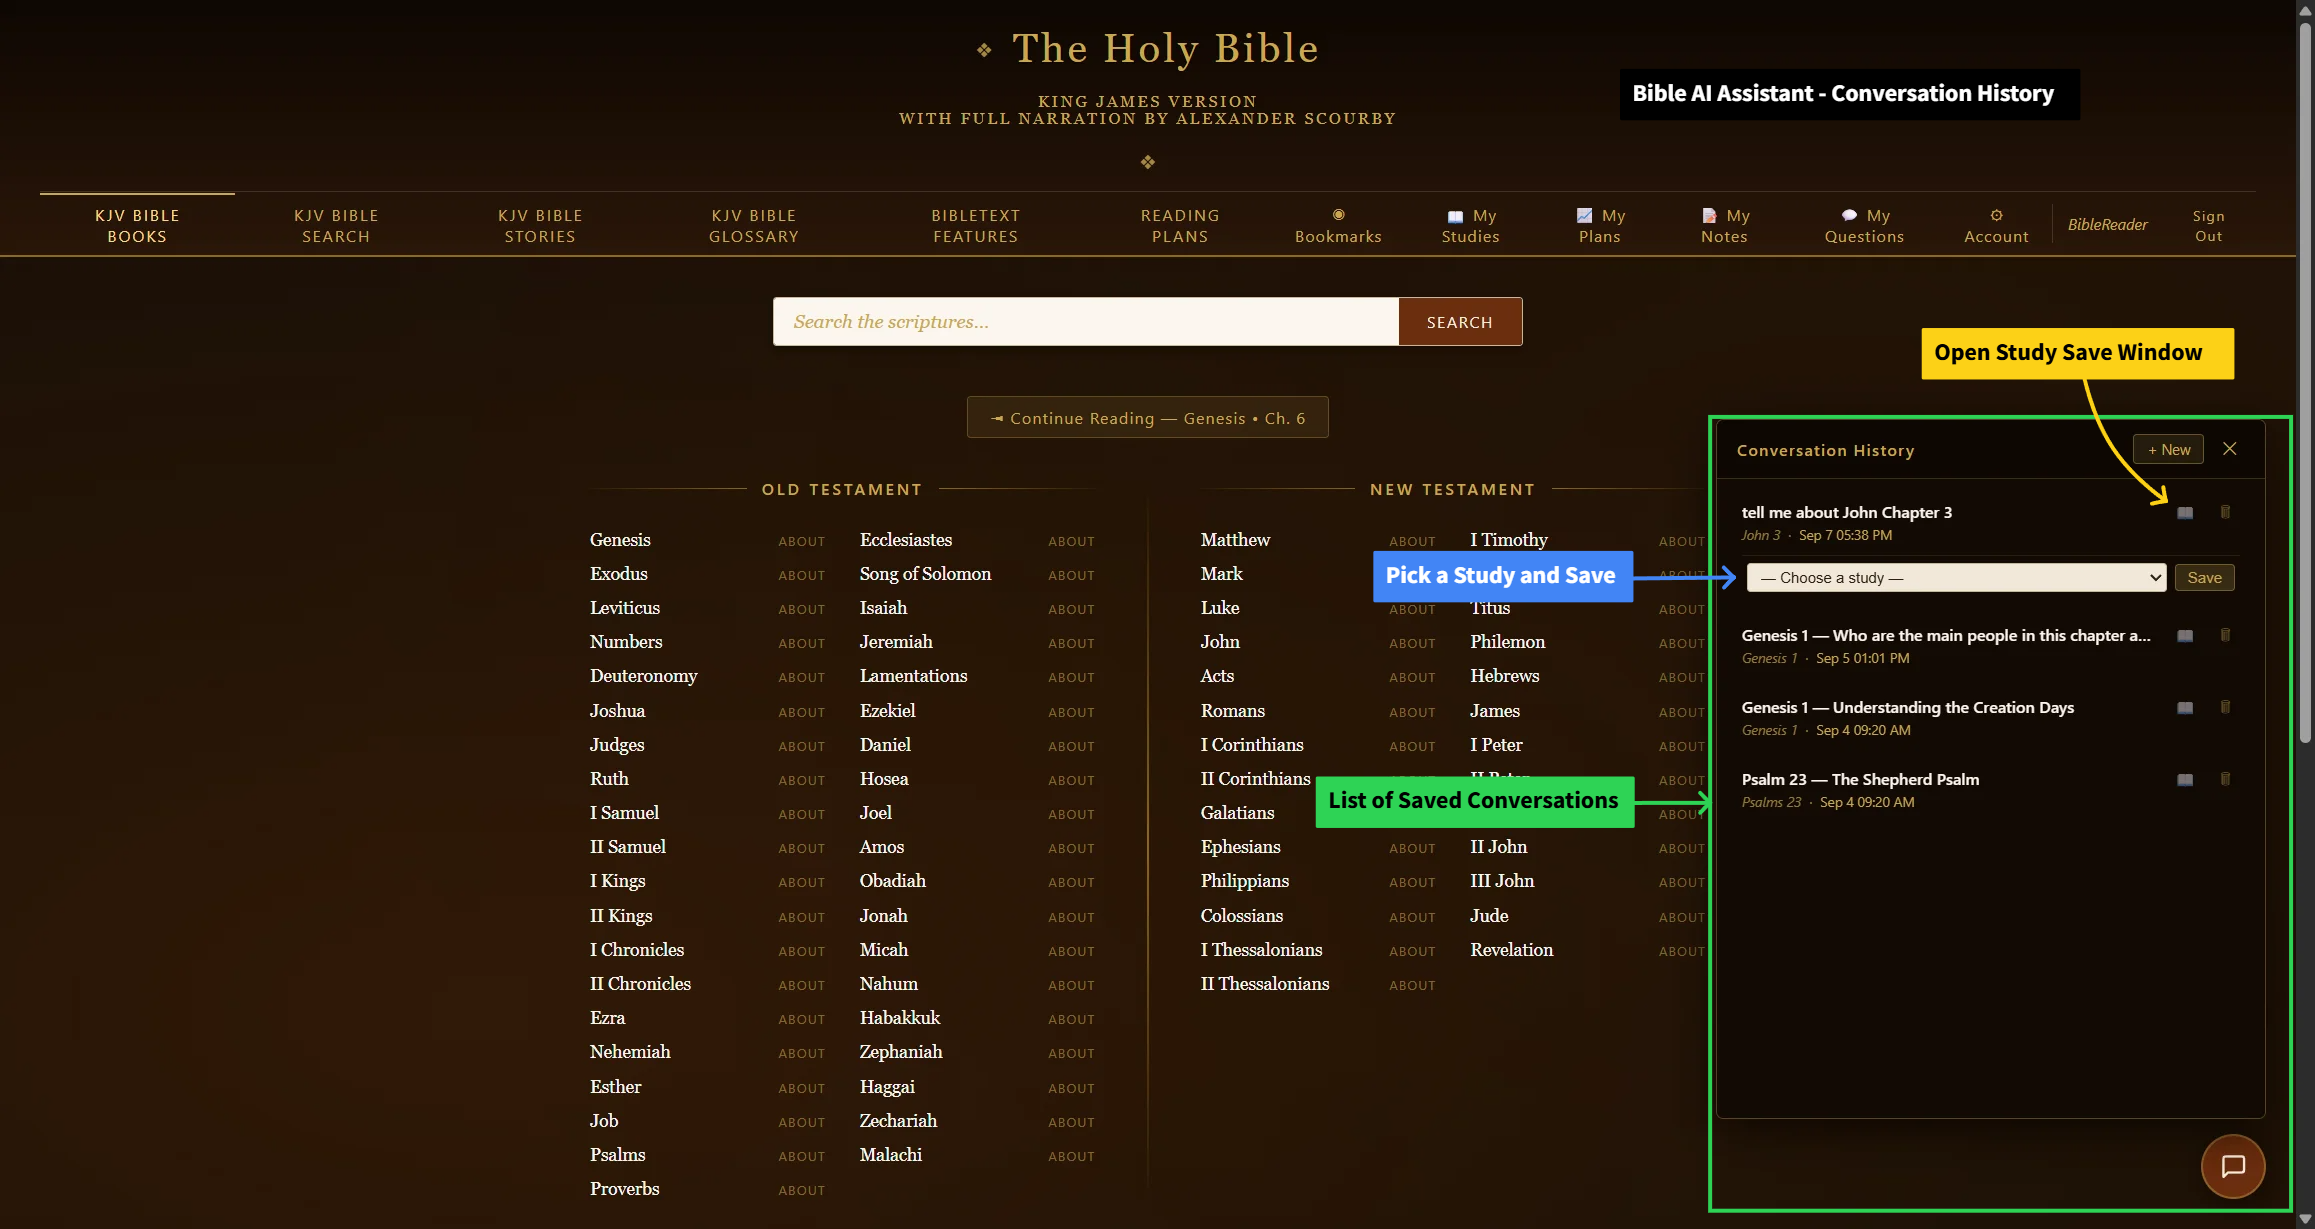
- From the Bible Assistant chapter chatbot’s Conversation History, click Add to Study on any saved conversation.
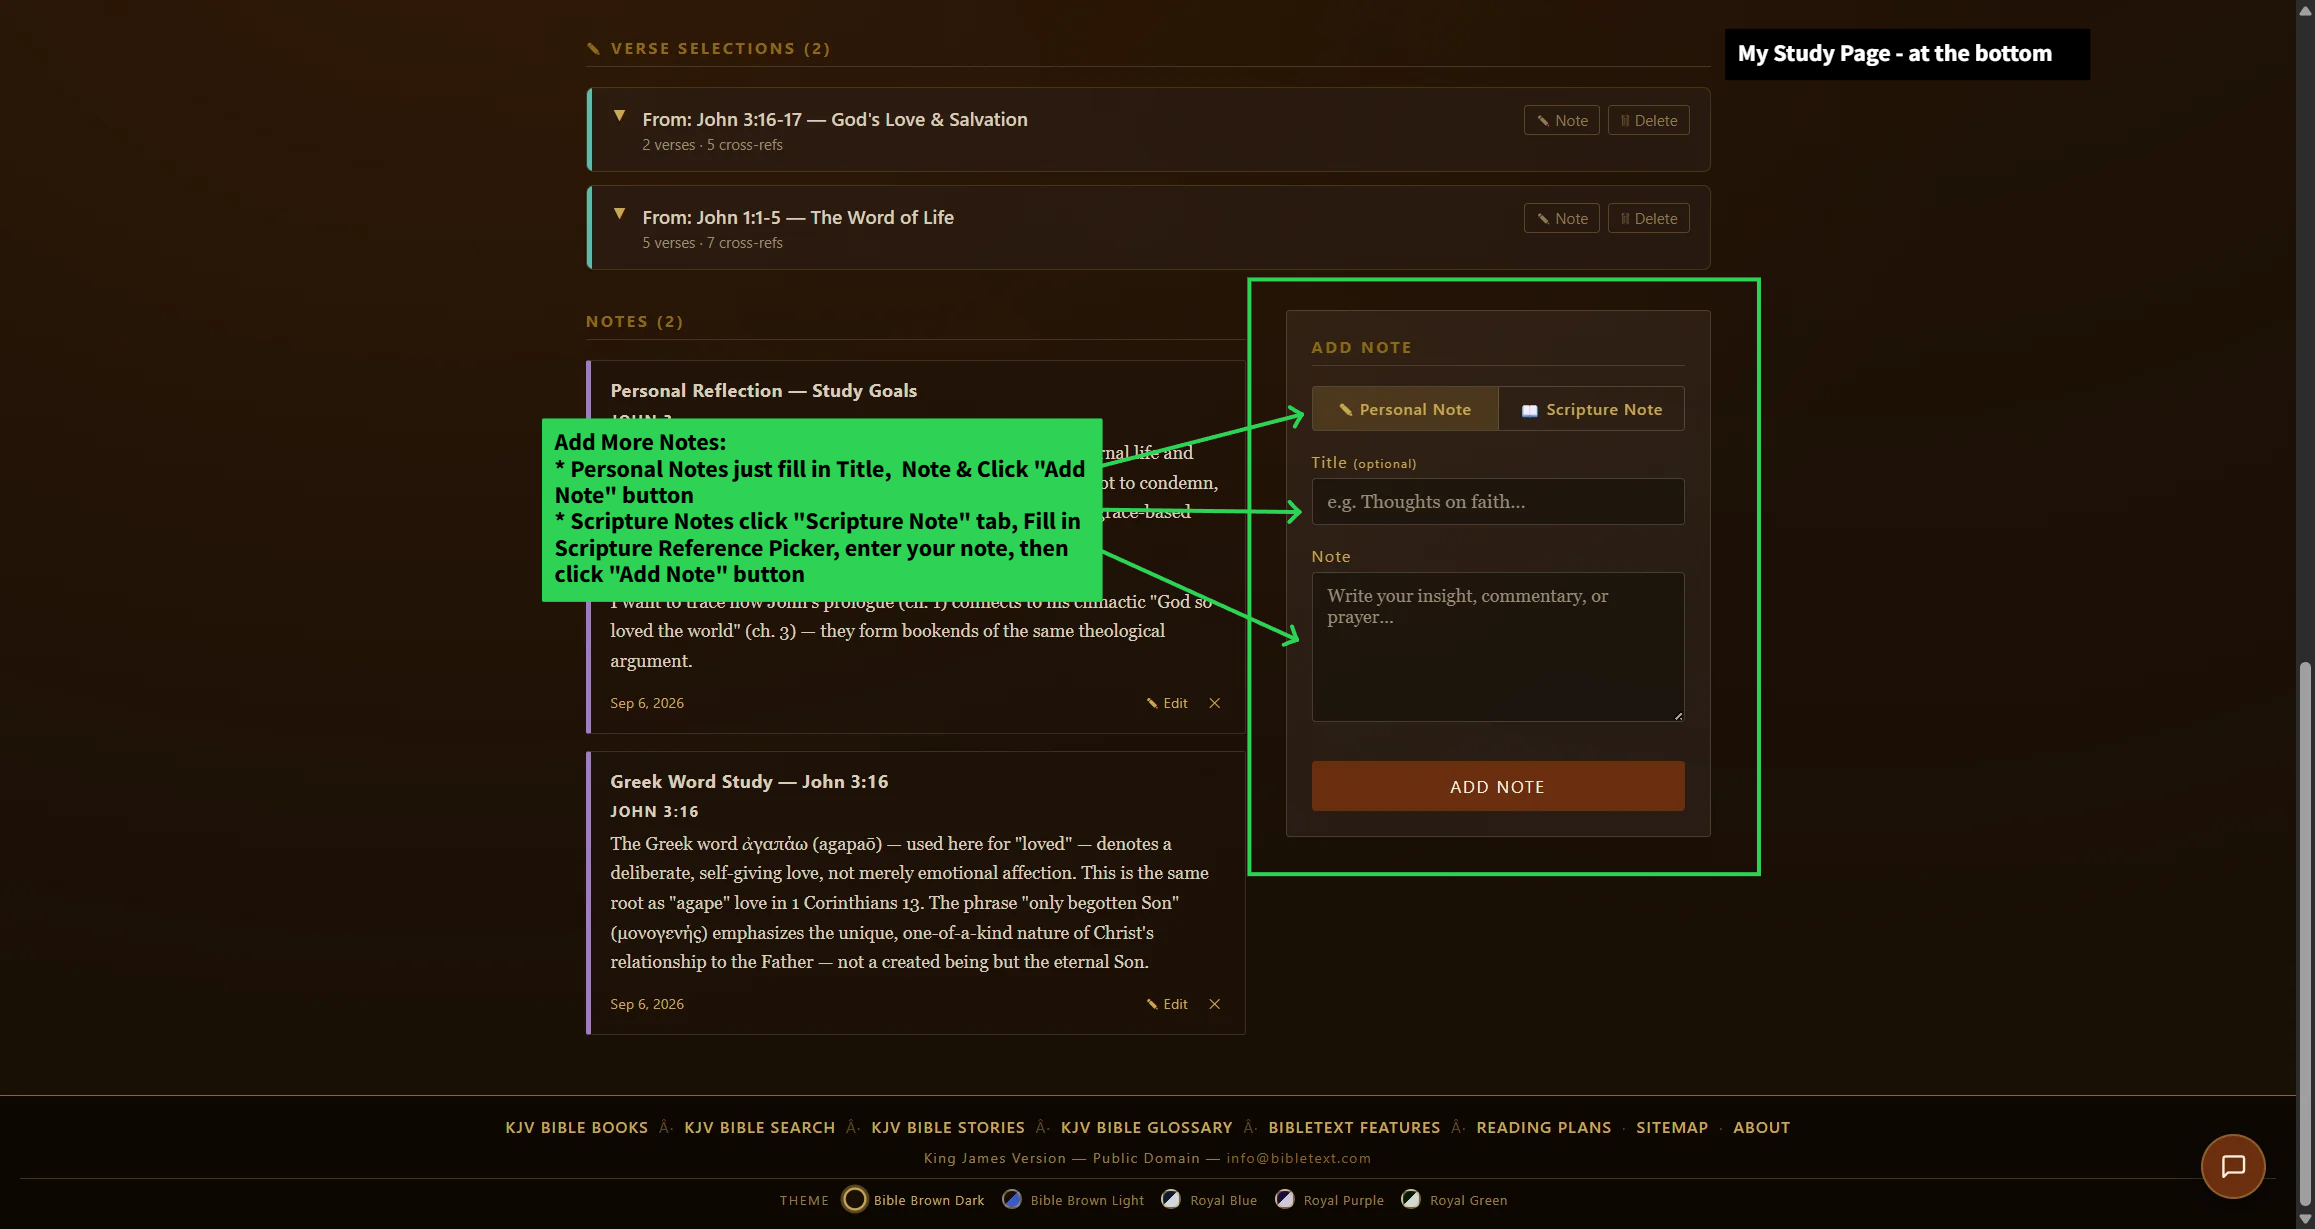
- From a study’s own Notes section, both Personal Notes and Scripture Notes are already part of the study — no separate Add to Study step is needed for those.
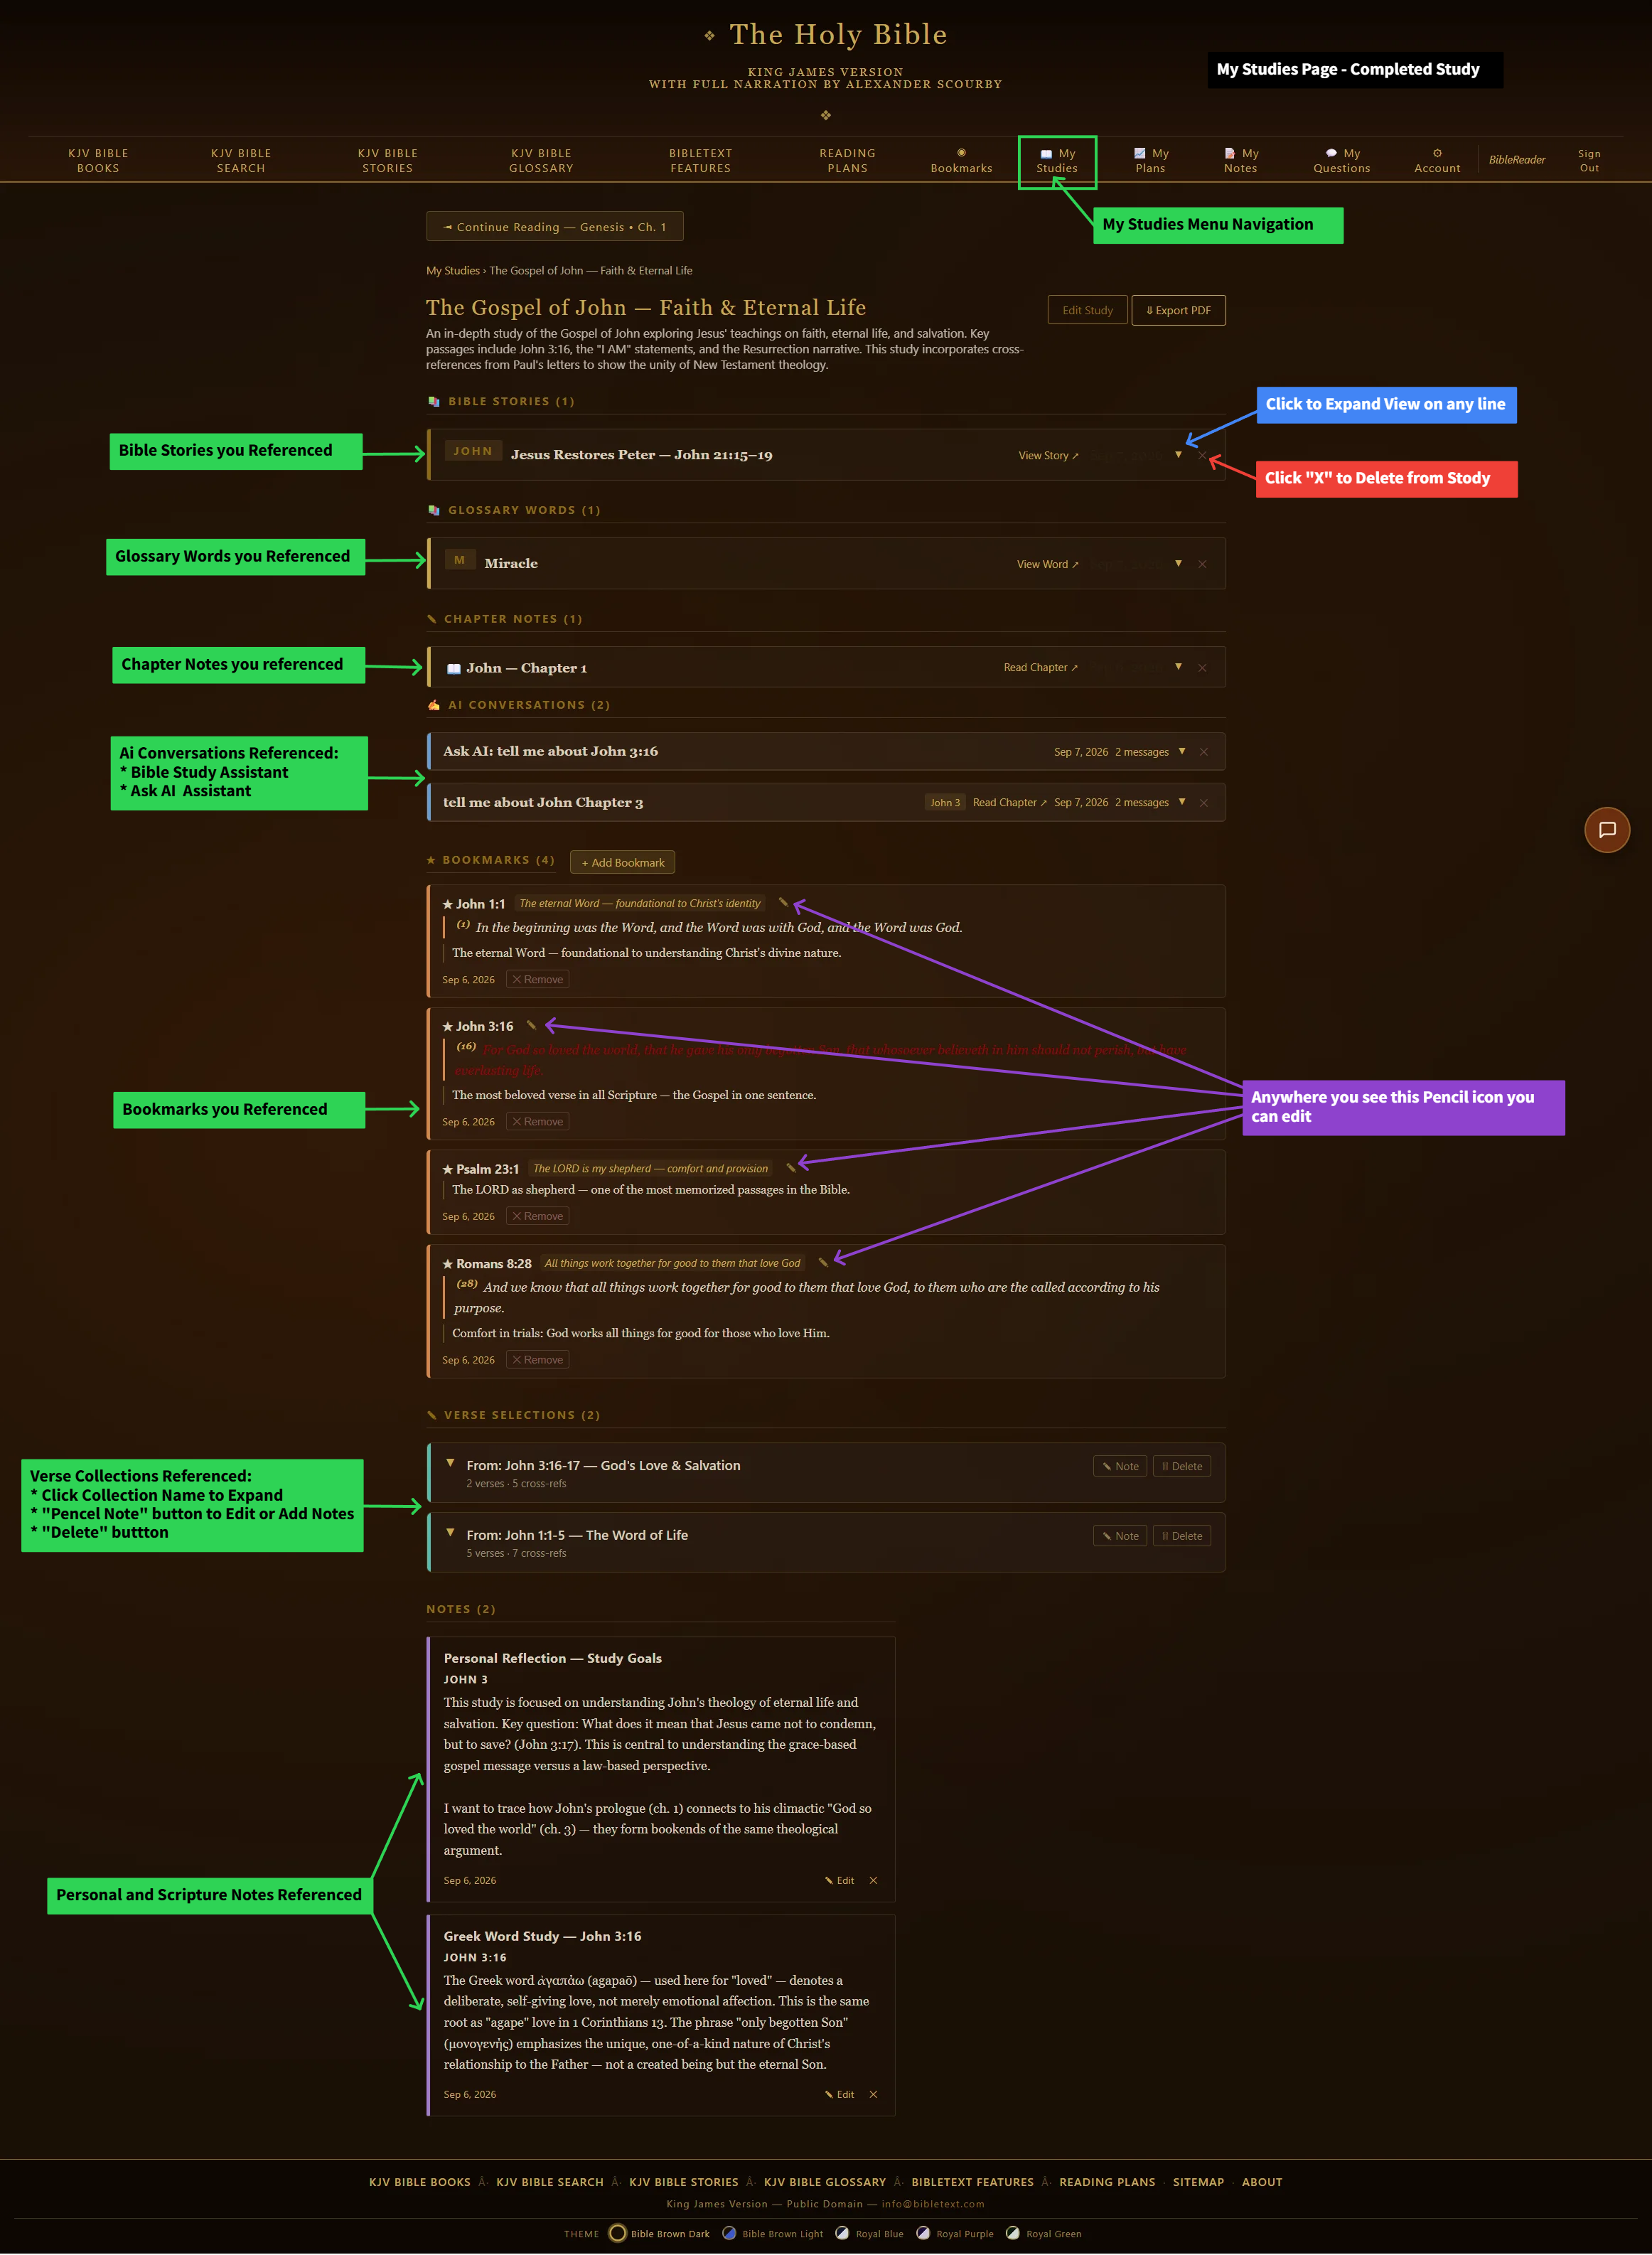
- This is the Study Overview page, where everything you’ve added comes together in one place.
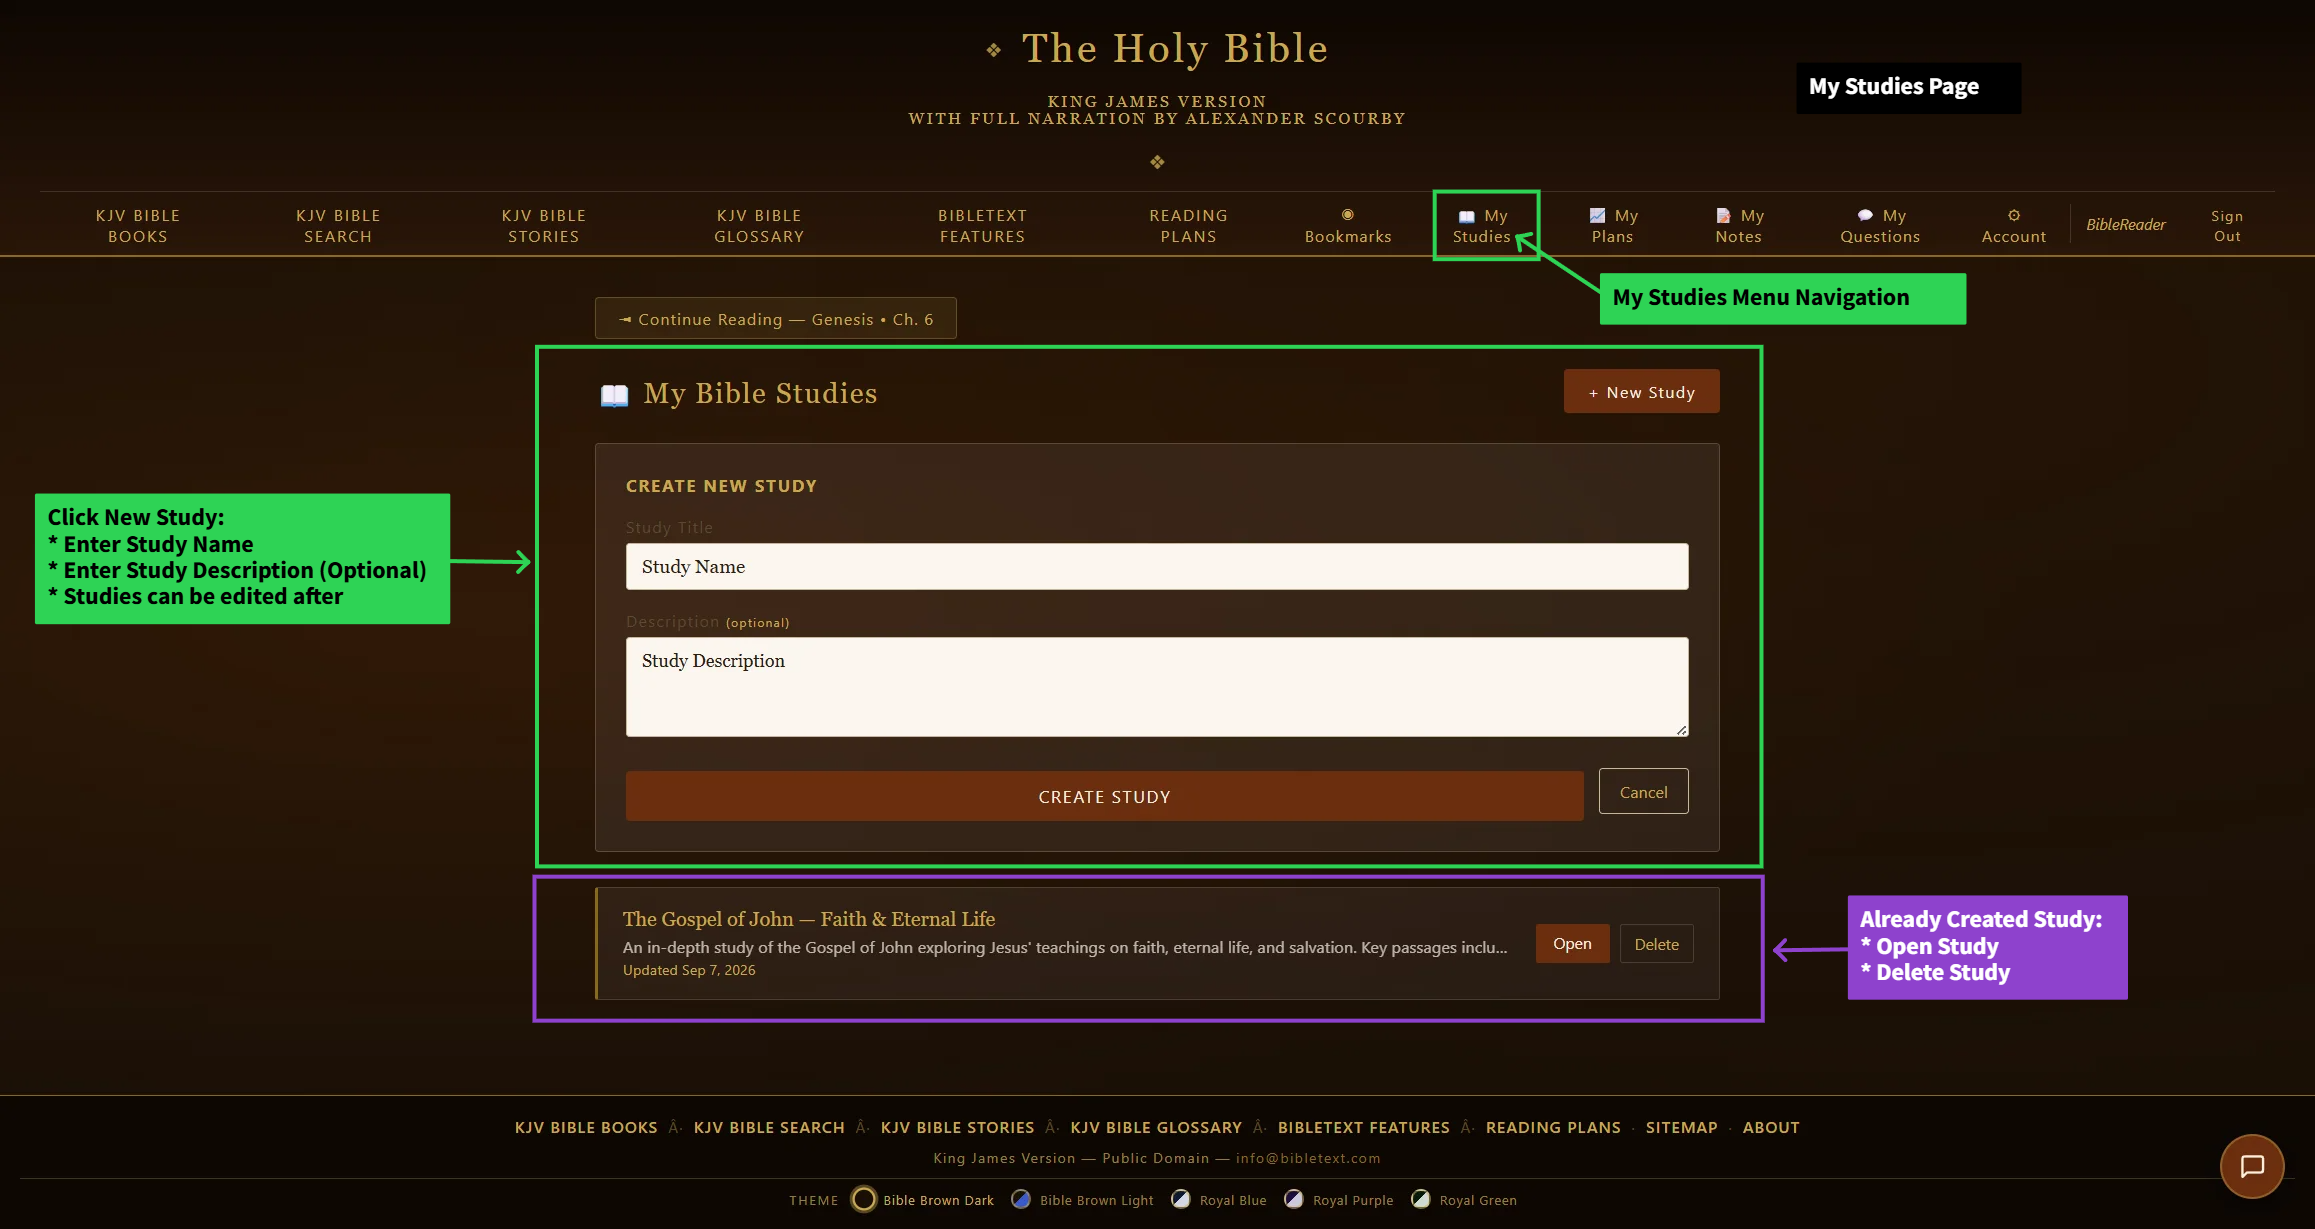
Step 1 — create a study from My Studies, or on the fly from the Add to Study prompt.
Adding a verse collection to a study never removes it from My Bookmarks — it simply links the same collection into the study too, and you can still delete the whole group or just one cross-reference from either place.